Connect Jira to QA Companion-AI so exported bug reports are created in the right Jira project with the right field mappings. Estimated setup time: 10-15 minutes.
INFORMATION TO PREPARE BEFORE SETUP
INFORMATION TO PREPARE BEFORE SETUP
🔗
Atlassian Base URL
Your Jira site URL, typically formatted as https://<yourcompany>.atlassian.net/.
📁
Jira Project
Ensure your team has a space to collect and manage bug reports from QA Companion-AI.
🛡️
Administrator Access
Ensure you have administrator permissions for your team's site as it is required to generate the Atlassian API token used for the integration.
Connect Jira to QA Companion-AI
connect jira to
qa companion-ai
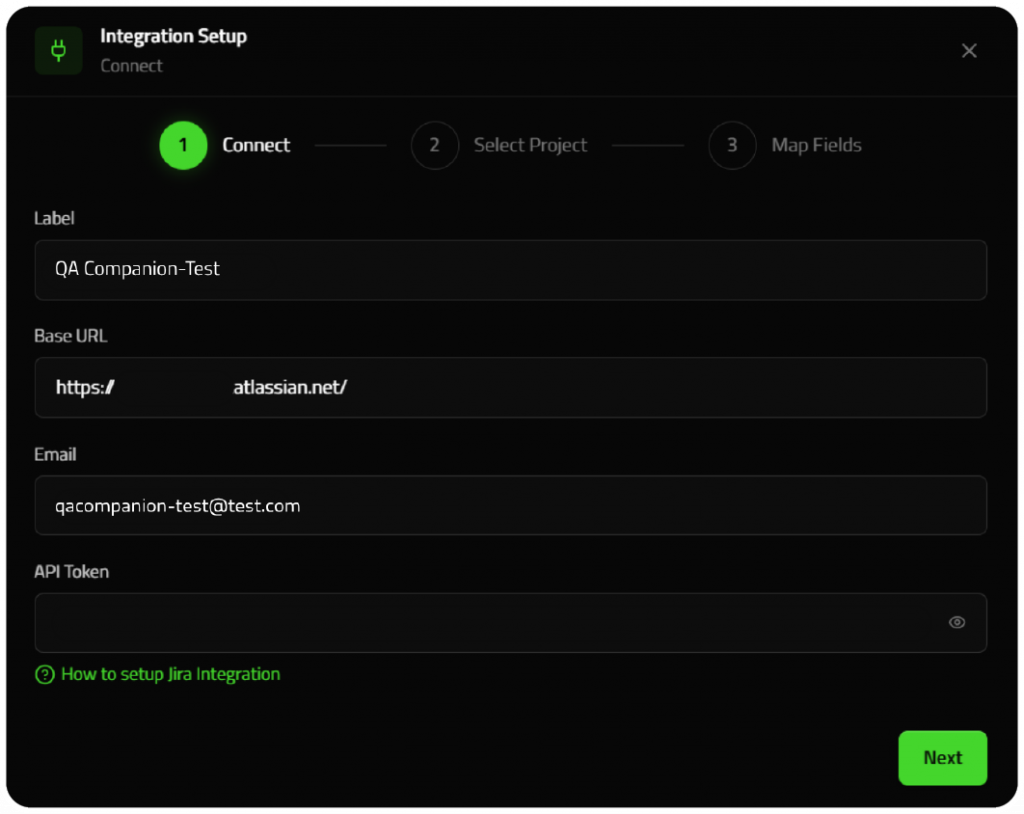
STEP 1: FILL IN THE FOLLOWING FIELDS during integration setup
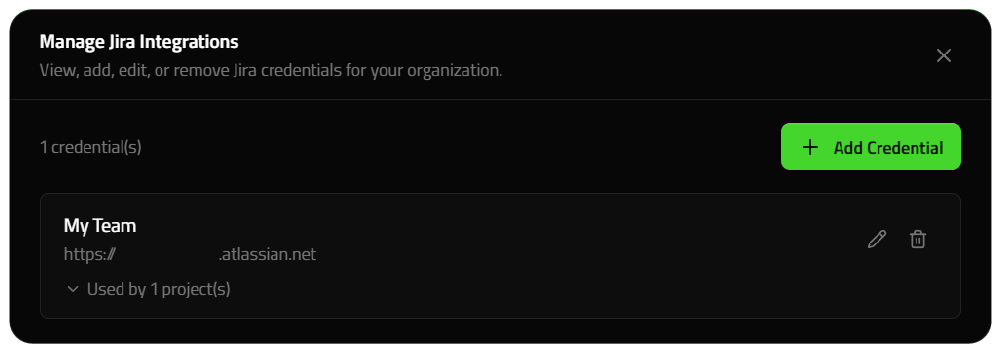
Label: Enter a label that helps your team recognize this Jira connection later. Atlassian Base URL:Use your full Atlassian site URL in this format https://<yourcompany>.atlassian.net/. Email: Enter the same email address associated with your Jira account.
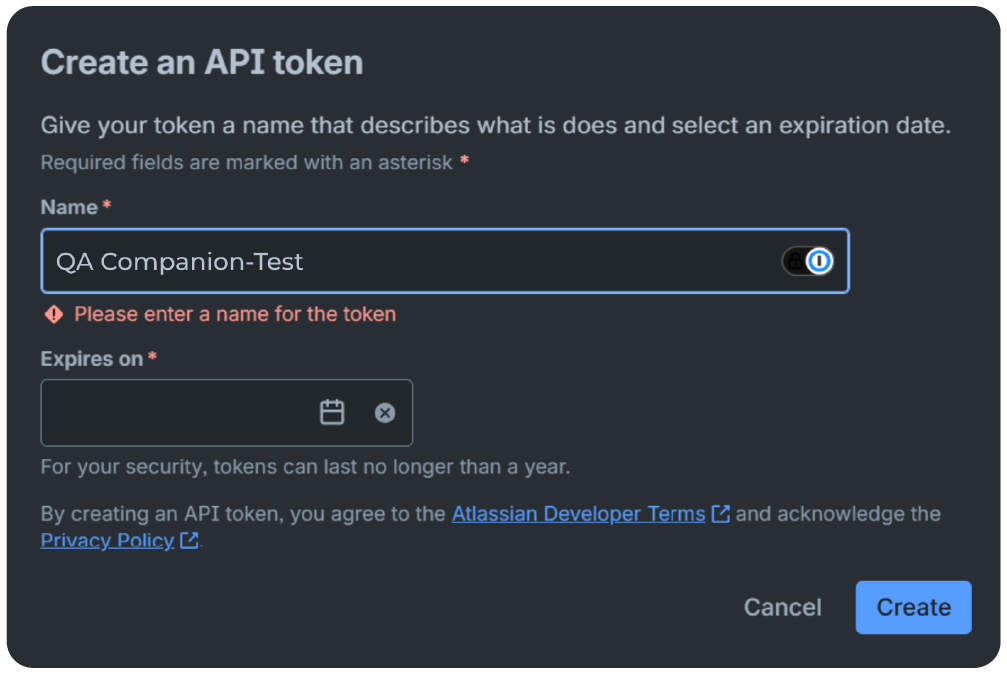
STEP 2: Generate an Atlassian API Token
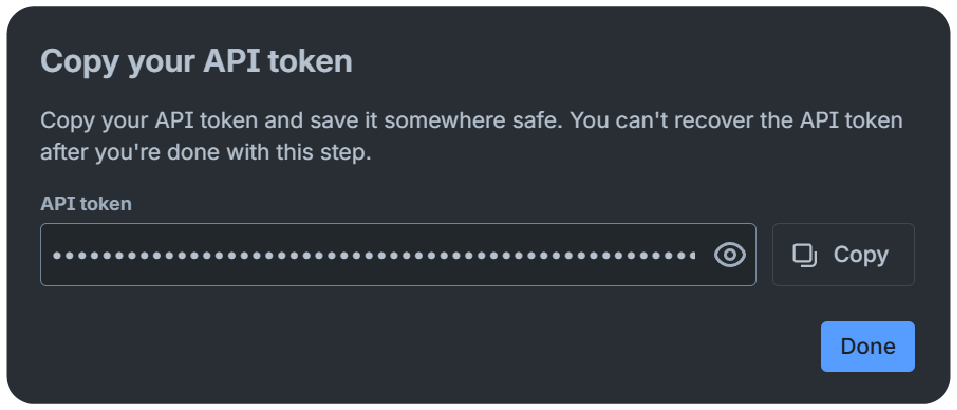
Go to the Atlassian account API token page, create a token for QA Companion-AI, and copy it immediately. Atlassian only displays the token once.
To avoid service interruptions, set a longer expiration date. You will need to generate a new token if the current one expires.
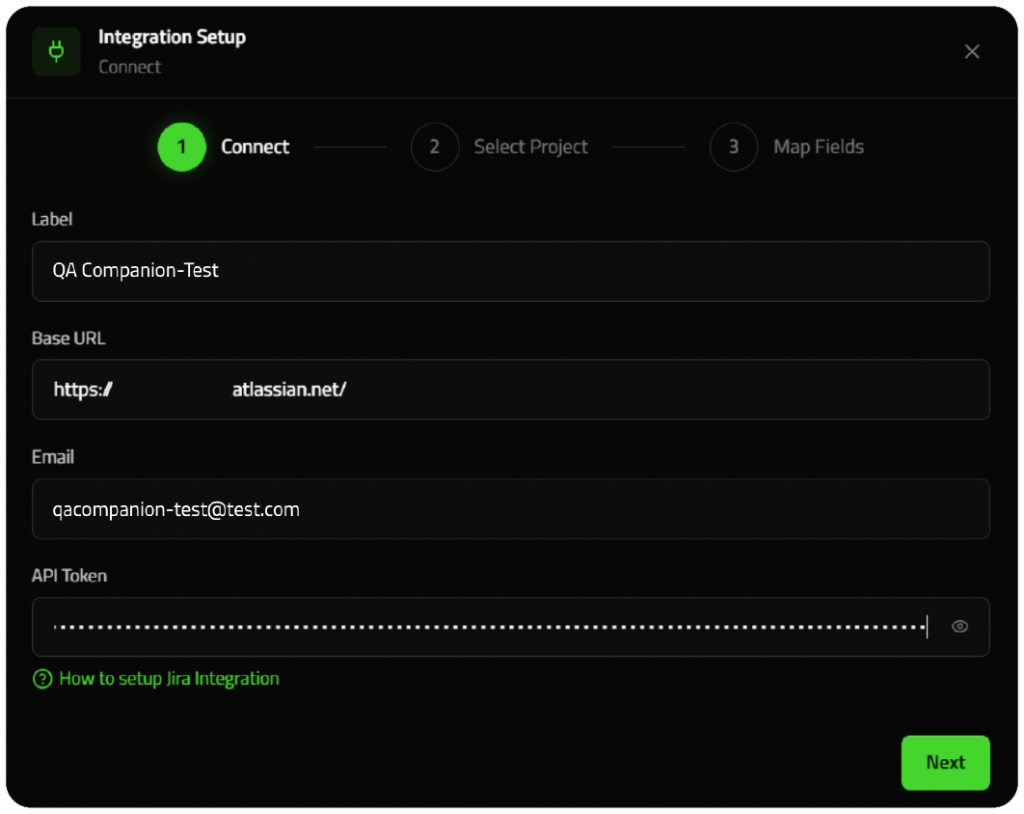
Step 3: Paste the API token into QA Companion-AI
Return to QA Companion-AI, paste the token into the API Token field, then click Next.
Security note: Treat the API token like a password. Copy it only into QA Companion-AI. Store it securely if your team requires a record of integration credentials.
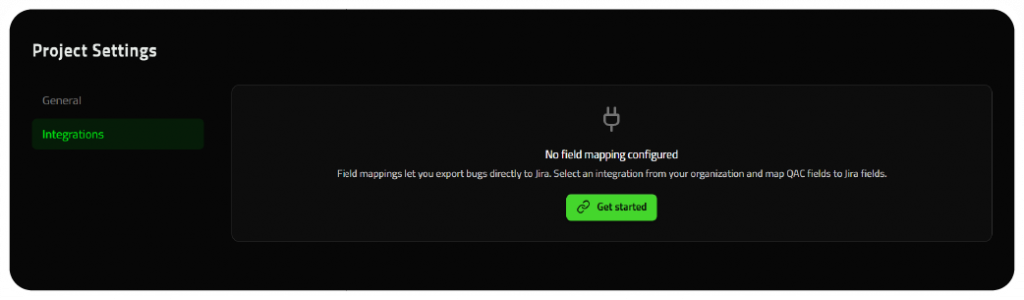
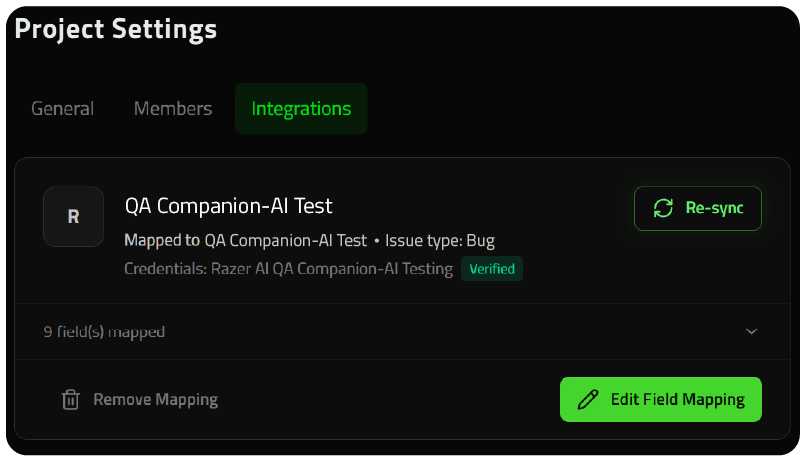
Step 4: CREATE PROJECT MAPPING IN PROJECT SETTINGS (OPTIONAL)
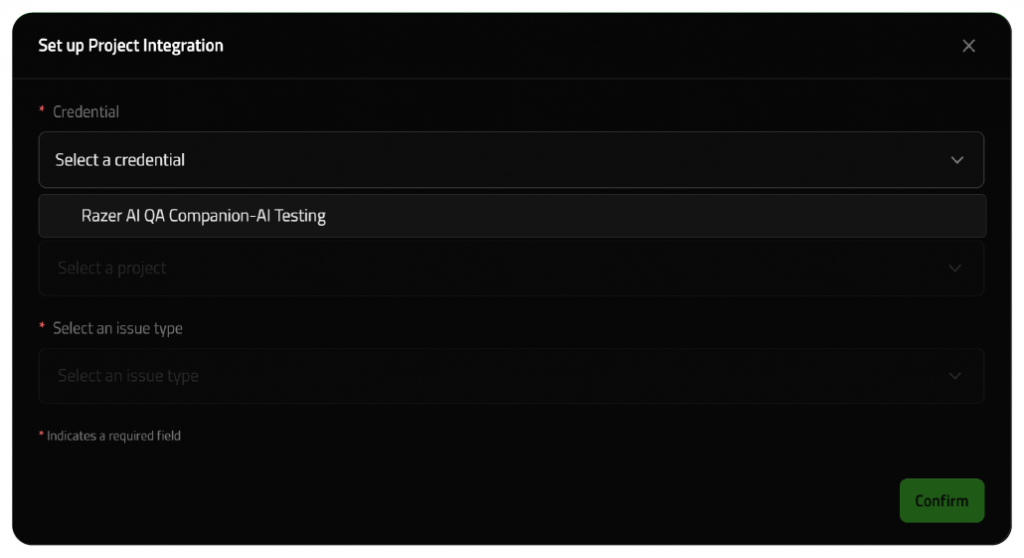
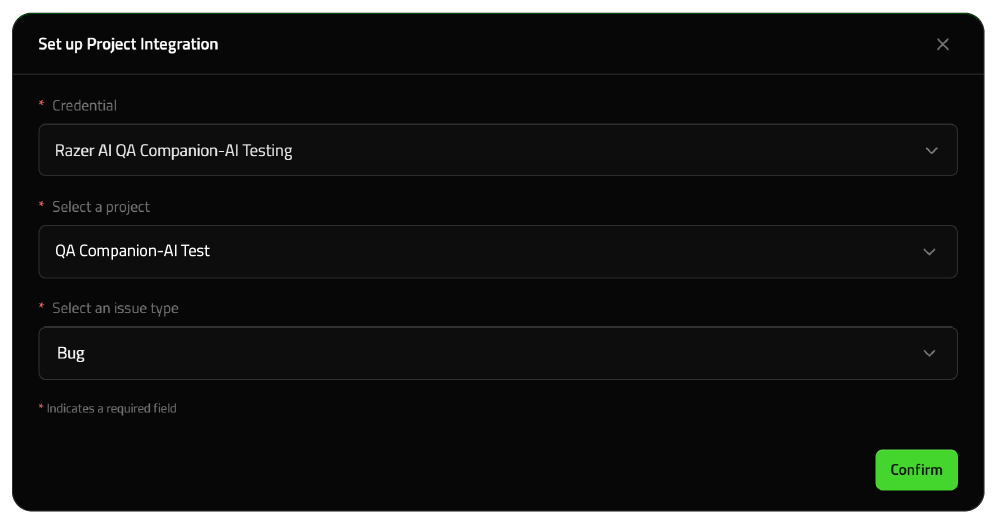
After inputting your integration details, you will be asked to create a new project mapping.
The Jira connection has been established at this stage; however, completing the project mapping ensures that exported bug reports are directed to the correct Jira project and displayed with the appropriate field structure.
On the Project Settings page, click Get Started to begin project mapping.
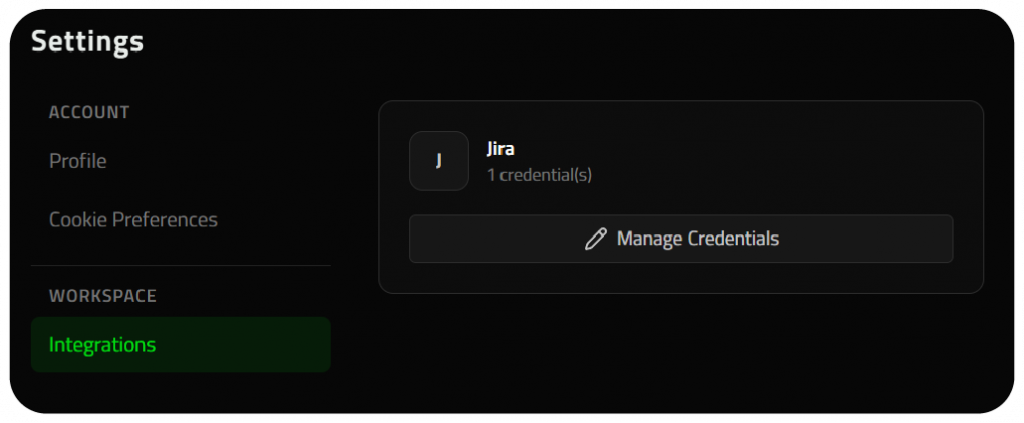
First, connect your Jira workspace to QA Companion-AI. This ensures that exported bug reports are sent to the correct Jira project.
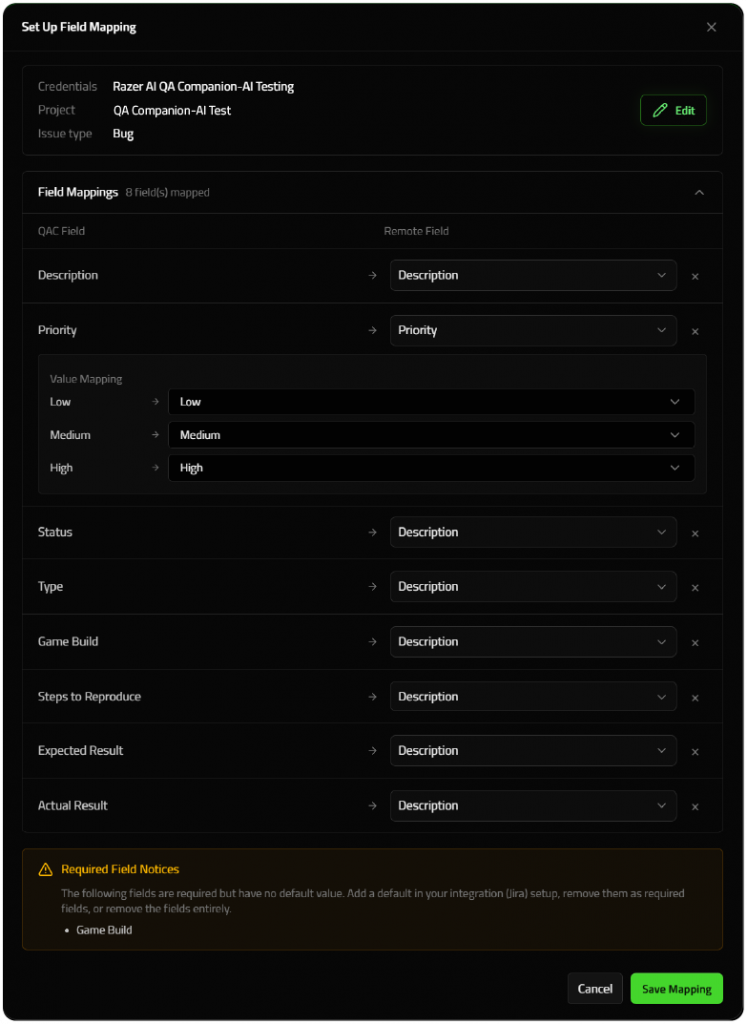
On the field mapping screen, confirm that QA Companion-AI fields map to the correct Jira fields for your team. Adjust the mapping as needed before continuing. Remember to map all your required Jira fields in order to proceed.
Click ”Save Mapping” to save your project field mapping.
Step 5: Finish setup
The Integration Settings page will confirm that Jira is successfully connected.
FAQ
API token lost or exposed
Revoke the old token in Atlassian and create a new token for the integration.
Bug reports appear in the wrong project
Review the selected project in the integration settings and update it to the correct Jira project.
QA Companion-AI cannot connect to Jira
Confirm the base URL is correct, the email matches the Jira account, and the API token was copied without extra spaces.
Subscribe to the Razer AI Gaming Newsletter
Receive official updates on Razer's AI gaming initiatives and related corporate developments.