run OpenClaw WITH RAZER AIKIT on THE
RAZER Blade 18
A step-by-step guide to set up your own personal AI assistant on your Razer Blade 18
Run OpenClaw, previously known as Moltbot, locally on Razer Blade 18 to monitor tasks in real time and automate workflow actions in the background. Install and configure OpenClaw and use Razer AIKit to enable low-latency, on-device AI without cloud dependency. Blade 18 is built for sustained heavy workloads, keeping performance stable while data stays local and setup remains minimal – so the hardware does the work while you build.
Prerequisite Steps to Install OpenClaw
step 1: Ensure WSL on windows 11 or Ubuntu 24.04 is installed on your blade 18 along with the latest drivers
Step 2 — Install docker + node.js
Run the code below for Docker installation:
					# Add Docker's official GPG key:
sudo apt update
sudo apt install ca-certificates curl
sudo install -m 0755 -d /etc/apt/keyrings
sudo curl -fsSL https://download.docker.com/linux/ubuntu/gpg -o /etc/apt/keyrings/docker.asc
sudo chmod a+r /etc/apt/keyrings/docker.asc

# Add the repository to Apt sources:
sudo tee /etc/apt/sources.list.d/docker.sources <<EOF
Types: deb
URIs: https://download.docker.com/linux/ubuntu
Suites: $(. /etc/os-release && echo "${UBUNTU_CODENAME:-$VERSION_CODENAME}")
Components: stable
Signed-By: /etc/apt/keyrings/docker.asc
EOF

sudo apt update

sudo apt install docker-ce docker-ce-cli containerd.io docker-buildx-plugin docker-compose-plugin
sudo usermod -aG docker $USER
newgrp docker
Next, run the code below for Node.js installation:
					# Download and install nvm:
curl -o- https://raw.githubusercontent.com/nvm-sh/nvm/v0.40.3/install.sh | bash

# in lieu of restarting the shell
\. "$HOME/.nvm/nvm.sh"

# Download and install Node.js:
nvm install 24
Step 3 — Install nvidia container toolkit
Run the code below:
					nvidia-ctk runtime configure --runtime=docker --config=$HOME/.config/docker/daemon.json
systemctl --user restart docker
sudo nvidia-ctk config --set nvidia-container-cli.no-cgroups --in-place
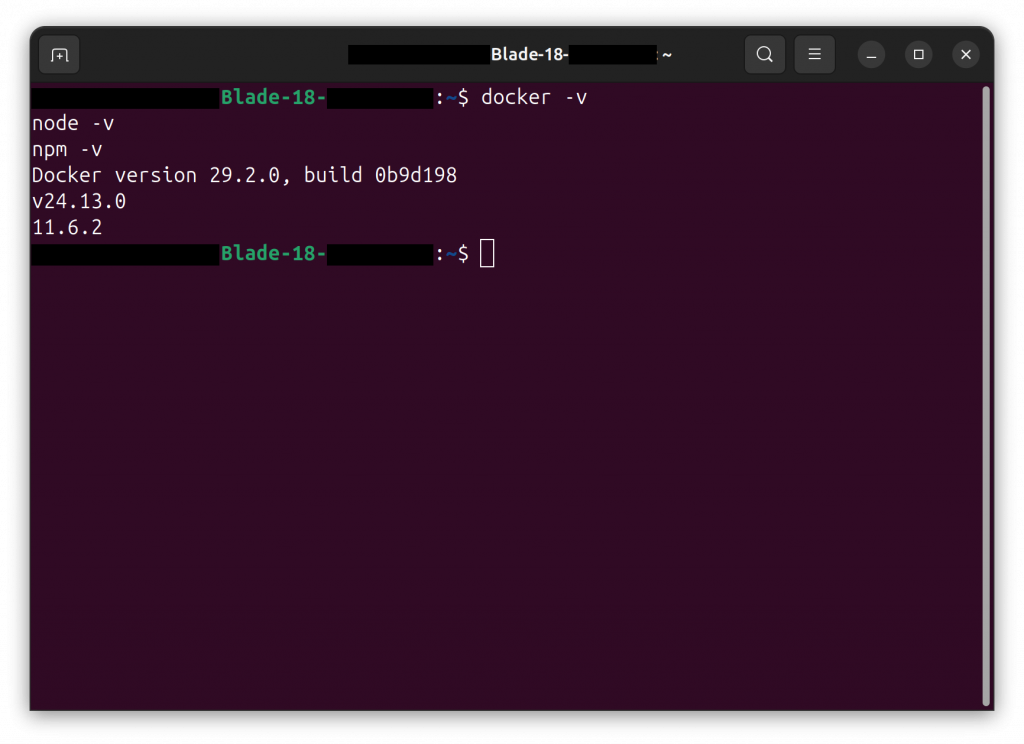
Step 4 — Verify Installation
Run the code below:
					docker -v
node -v
npm -v
Razer AIKit Installation & Inferencing
Step 1 — PULL & Start AIKit Container
Run the code below:
					mkdir -p $HOME/.cache/huggingface

docker run -it \
  --restart=unless-stopped \
  --gpus all \
  --ipc host \
  --network host \
  --mount type=bind,source=$HOME/.cache/huggingface,target=/home/Razer/.cache/huggingface \
  razerofficial/aikit:latest
Step 2 — DOWNLOAD MODEL
Once inside the container, run:
rzr-aikit model download openai/gpt-oss-20b
Notes:
This guide uses openai/gpt-oss-20b. You can also try other models like DeepSeek-R1-Distill-Qwen-7B or Meta-Llama-3-8B, available on Hugging Face.
If your selected model exceeds the memory capacity of a single Razer Blade 18, use Razer AIKit, our open-source solution, to optimize the load across a cluster of GPUs. Further scale your local AI workstation with our Razer eGPU and Forge AI Dev Workstation to increase GPU resources for higher-level inferencing.
Step 3 — Start the model server
Run the code below:
rzr-aikit model run openai/gpt-oss-20b
Note: If running on WSL, include the flag--gpu-memory-utilization 0.8
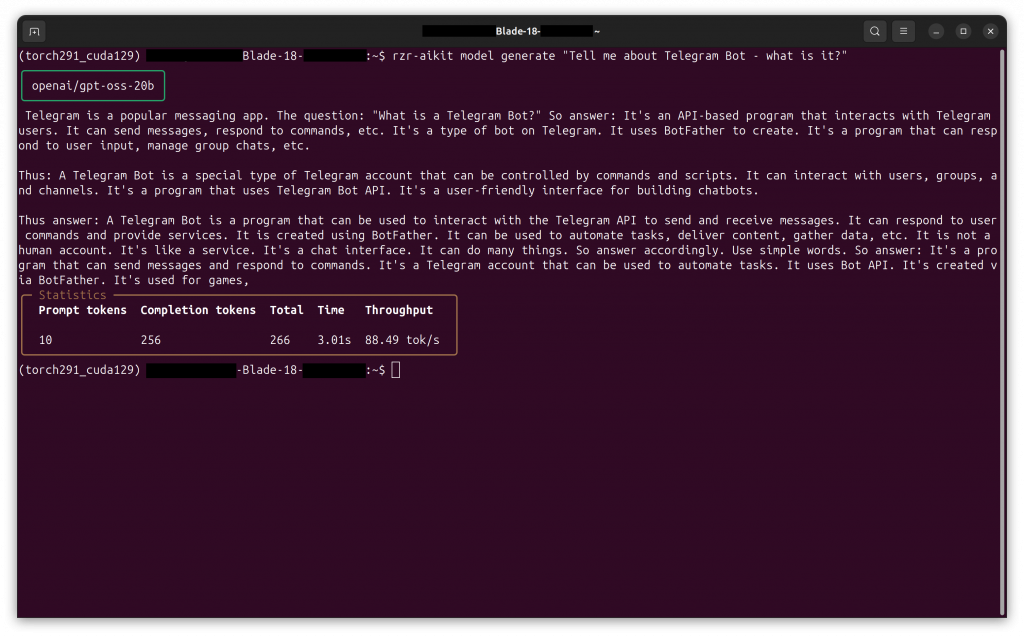
Step 4 — test model inference (optional)
To confirm the model is running correctly, execute:
rzr-aikit model generate "Tell me about Telegram Bot - what is it?"
OpenClaw Installation & Configuration
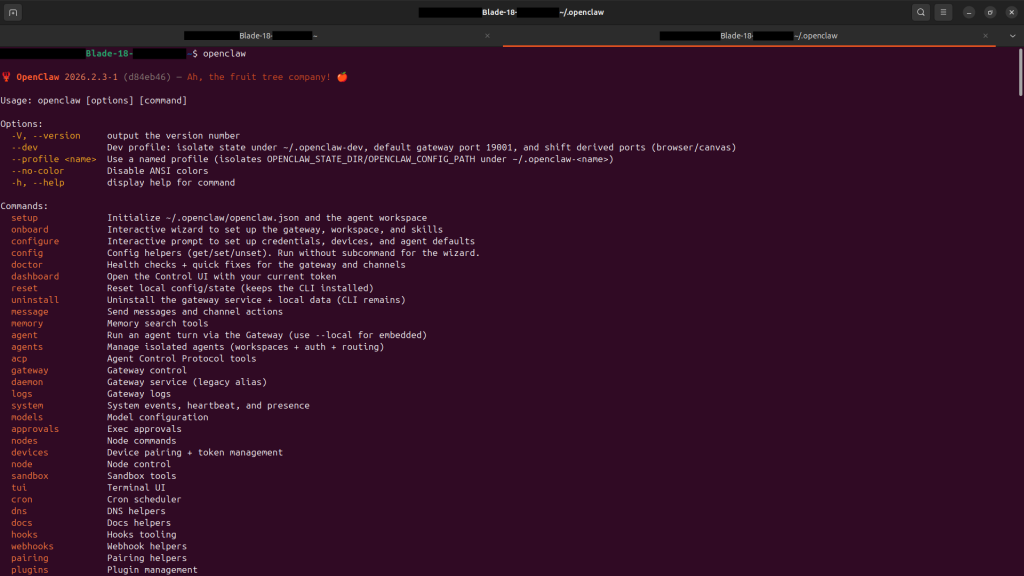
Step 1 — Install openclaw
Run the code below:
npm install -g openclaw@latest
Verify the installation by running:
openclaw
Step 2 — Configure Openclaw to use your local model
Run the code below:
					mkdir -p ~/.openclaw

cat > ~/.openclaw/openclaw.json <<'EOF'
{
  "models": {
    "mode": "merge",
    "providers": {
      "vllm": {
        "baseUrl": "http://127.0.0.1:8000/v1",
        "apiKey": "sk-local",
        "api": "openai-responses",
        "models": [
          {
            "id": "openai/gpt-oss-20b",
            "name": "GPT OSS 20B (Local)",
            "contextWindow": 120000,
            "maxTokens": 8192
          }
        ]
      }
    }
  },
  "agents": {
    "defaults": {
      "model": { "primary": "vllm/openai/gpt-oss-20b" }
    }
  },
  "gateway": {
    "mode": "local",
    "auth": {
      "mode": "token",
      "token": "razerai"
    }
  }
}
EOF
Step 3 — Start OpenClaw gateway
Run the code below:
openclaw gateway --allow-unconfigured
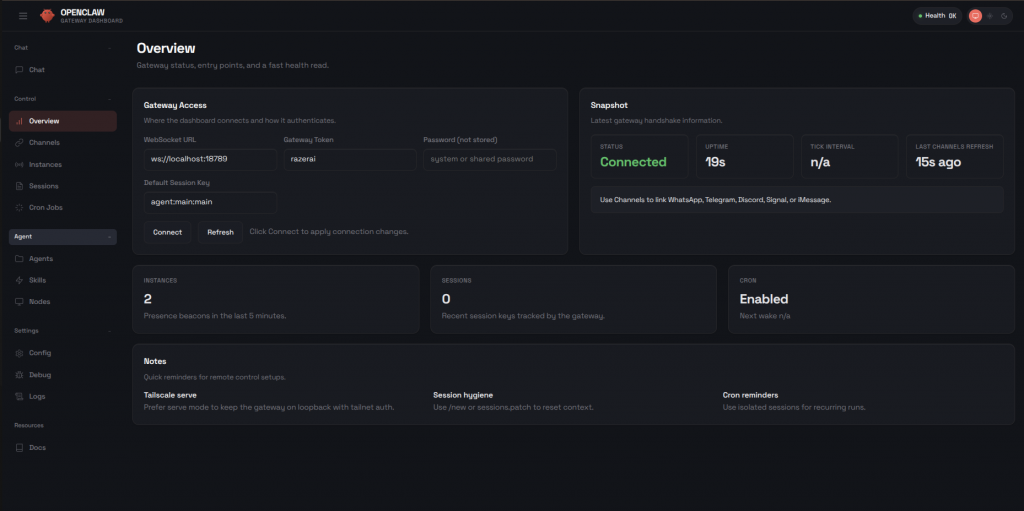
Step 4 — access openclaw webui
After the gateway starts, open your browser and go to: http://localhost:18789?token=razerai
Telegram Bot Configuration
Step 1 — Create a Telegram Bot Token
- Open Telegram and search for @BotFather
- Run the following command: /newbot
- Copy the token you receive, it will look like: 123456789:AAExampleTokenHere
Step 2 — Add Telegram Token to openclaw
Back on Terminal, add the following field to ~/.openclaw/openclaw.json
					}
...
  channels: {
    telegram: {
      enabled: true,
      botToken: "YOUR_TELEGRAM_TOKEN",
      dmPolicy: "pairing",
    },
  }
}
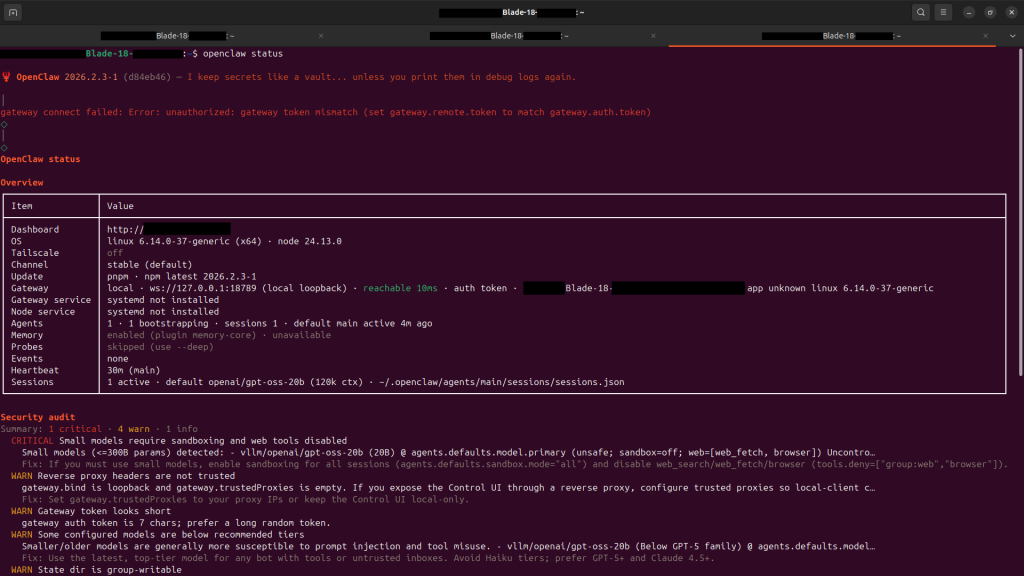
Step 3 — Check Telegram Status
Run the following code:
openclaw status
Step 4 — Text your Bot on telegram!
- Open Telegram
- Search for your new bot’s username
- Send a message:
- Bot will request to authenticate; run the command below:
openclaw pairing approve telegram <code>
your personal ai assistant openclaw is good to go!
Explore 50+ other automations enabled by Openclaw here
Note: OpenClaw is an experimental tool and not directly affiliated with Razer. Please ensure your environment is properly secured. Razer is not liable for data loss or issues arising from its use.

